Lustred Brush Strokes
•Posted on June 24 2019
This week I got word that we were featured in the real wedding blog by EasyWeddings.com.au!
As the cake designer, you're more often than not in and out before the festivities have even begun. Beyond the venue, you don't get to see how the rest of the event comes together. So, when I got the email that one of our couples had their wedding featured I was so excited to check it out. You can view the feature here.
It's also a great reminder of how lucky we are to play a part, no matter how small, in such an important event for so many people.
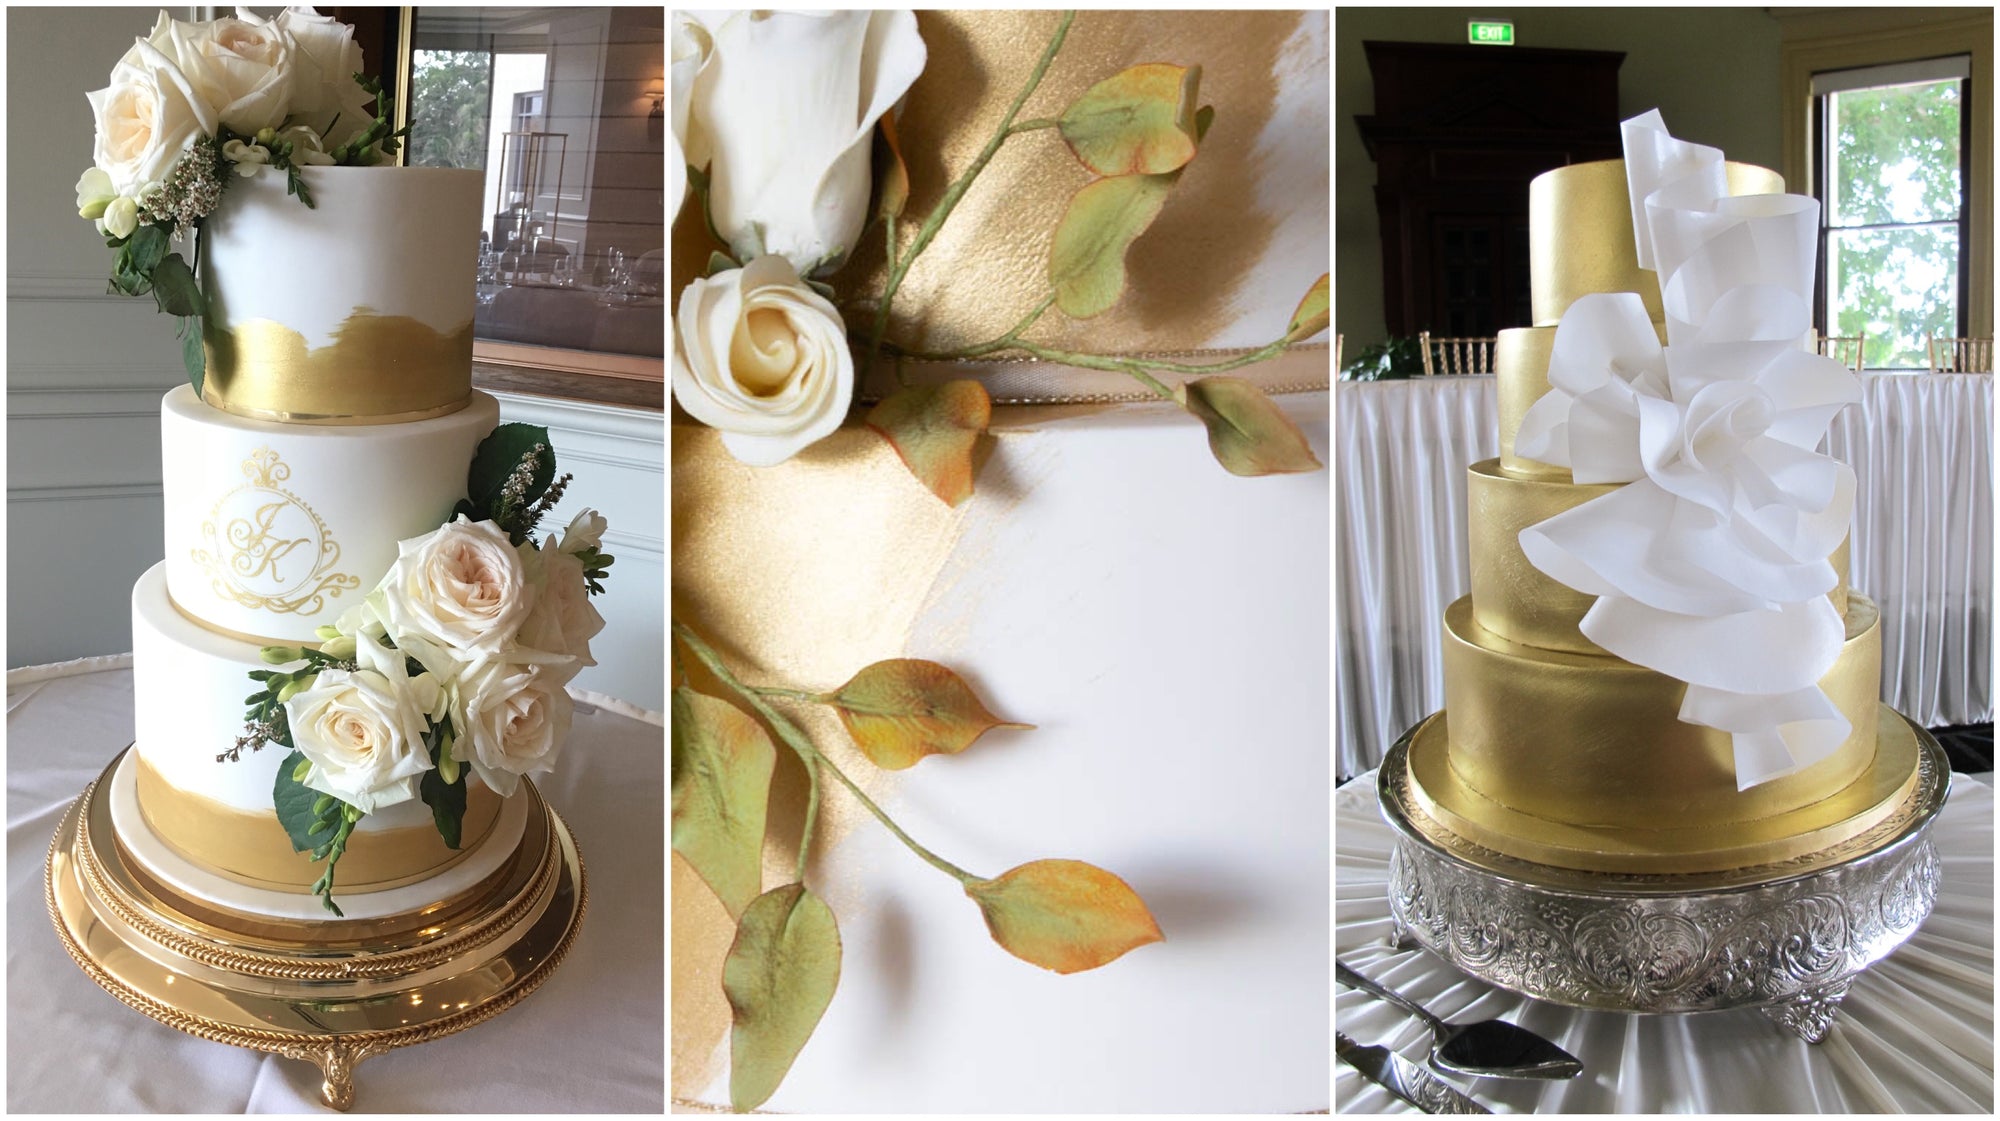
Our cake for Natasa and Jase was four tiers of alternating almond & coconut and caramel white choc mud cake, finished in white fondant with a painted gold lustre finish to each tier. I hand-made magnolia style sugar flowers to set off the simple design, which suited the contemporary décor at Moda Events perfectly.
 Photos courtesy of Pelizzari Photography.
Reminiscing about this cake got me thinking about a decorating technique I’ve been coming back to again and again. Painted lustred finishes.
Painting on cakes is one of my most favourite things to do. Obtaining a metallic lustred finish is one of the quickest ways to add a wow factor to your cake, or add an extra element of interest to a simple design.
Personally, I think the lustred finish has become so popular because gold and white themed cakes have been such a thing for the past few years. And, if you’re trying to achieve those royal touches without breaking the bank on gold leaf, lustre dust is the way to do it.
There are so many amazing lustres on the market. My personal fav is the Super Dust range by Rolkem. I mix the lustres with a rose spirit to achieve a beautiful metallic edible paint that isn’t opaque. It's perfect for applying to fondant or ganache (or cookies, or chocolate, or anything really!).
Here’s my tips and tricks for the perfect brushed metallic edible paint.
1. Use rose spirit
|
First of all, it’s probably a good idea to address why we use alcohol as the mixer for our edible paint. Most importantly, it is a quick drying liquid that evaporates fast, meaning less damage to the product you’re painting. As we know, fondant is predominantly sugar so if you’re applying something to it that is water based you run the risk of dissolving and damaging the icing of your cake. |
 |
When I first started decorating, I used vodka and that is fine in a pinch. However, when I started with the Cake & Icing Centre, I was exposed to how superior the texture, opacity and performance of a paint made with rose spirit is.
Rose spirit (or decorators’ alcohol) contains 95% alcohol and 1% rose spirit, which compares to an average of 40% alcohol in standard vodka. It's available in our online store here.
2. Paint consistency
 When I press the brush against the side of the cup, it is runny but not see-through.
 When I press the brush against the side of the cup, it is runny but not see-through.
Unlike watercolour style painting, when I’m applying a metallic brush stroke I don't want any transparency. Getting the consistency of your paint right is important so you don’t lose opacity. The pictures above show my preference for the thickness of my edible paint.
There isn’t really a recipe, it’s more about eyeballing the consistency of your mix as you go to find the perfect balance between your wet and dry ingredients.
Generally, what I’ve found is that I tend to start with equal parts lustre dust to rose spirit, or a 1:1 ratio. From there, if it's too thin you can either add more dust or simply allow your rose spirit to evaporate slightly. Too thick? Add more liquid (small amounts at a time, you can always add more later! I use an eyedropper for this purpose).
When mixing my edible paint, I always use a container that comes with a lid (something that you can put aside and keep specifically for that colour). Reason being, when you're done painting you can seal it up for another day. The rose spirit will evaporate but the residue of the dust remaining will be perfectly fine to add more liquid to the next time you want to paint. No waste!
3. Brush type
|
Get the right brush type for the project you’re undertaking. It’s worth it, trust me. I painted the below four tier cake completely gold in record time using our Lushes Lustre Brush. The size of the brush together with the soft bristles enabled me to cover a huge area quickly with no streaks. Firm bristles will scratch your paint, leaving lines. Soft brushes give a better result and if you’re painting a whole cake, the bigger the brush size the better. All of the cakes below were entirely white fondant before I got painting. You can see how the right consistency and brush will give a smooth, professional finish. |
 |

If you give lustre painting a go, make sure you get in touch and leave us a comment below! We'd love to hear from you.
~Sarah-Jane

Comments
0 Comments
Leave a Comment