Cake of Thrones
•Posted on August 26 2019
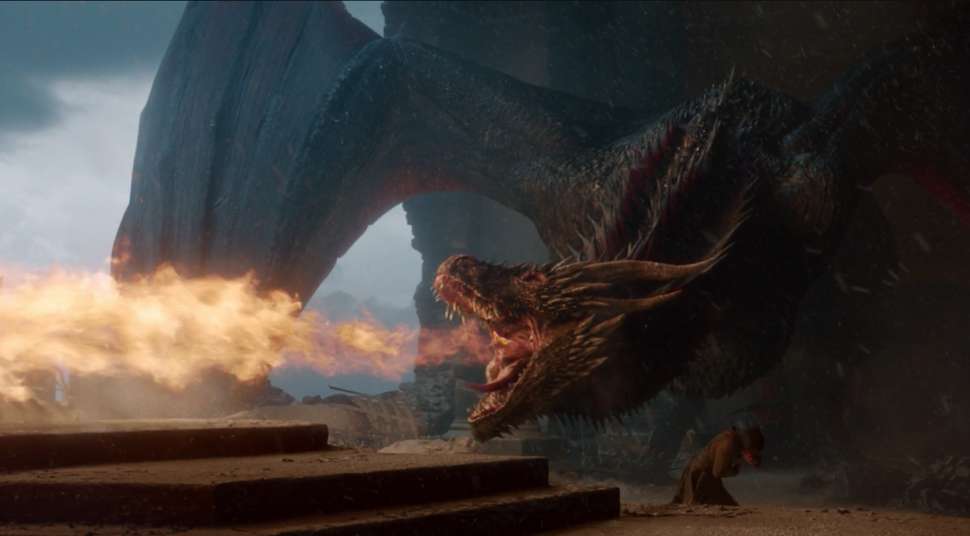
Last week I was gifted the perfect salve to fill the Game of Thrones sized hole that I’ve had in my life since the show finished up. We were commissioned to create a half-metre tall, iron throne replica cake for a 40th birthday party!
We opted for a throne post-Drogon treatment (obviously haha). Although all the cakers out there know it’s always best to be specific when you’re taking notes on design for a custom cake, am I right!?

I thought it might be fun to share some of the tools I used to achieve the finished look.
Step 1 - Carving the cake
Whenever I’m carving a large shape, I always prefer to work with our signature chocolate mud cake. It is a beautifully dense and traditional chocolate mud cake (made from scratch with both whisky and coffee in the ingredients). If you don't have your own recipe, our Mississippi Mud Cake Mix is great for stacking and carving.
I layered mud cake with ganache to build up the shape of the seat and then structured the back piece with supporting dowels and cardboard cake boards (cut to size), just to support the weight and give a little extra stability.
The whole cake was kept in place with super-strong 1:4 ratio dark chocolate ganache.
Here’s a bonus tip, when I’m smoothing ganache over odd shapes I use Cake Sharpies. Sharpies are normally used for achieving sharp edges on fondant but they also double as flexible smoothers for scraping ganache along curved sections.
We set the throne in our fridge for an hour or so before working on the fondant pieces.

Step 2 - Fondant Swords
From the start, I knew I’d be airbrushing the cake, so the colour of the fondant was unimportant. Still, I did put a soft grey through using a touch of Coal Black Chefmaster gel colouring.
Here’s where I got myself in a pickle with regards to how long the project took. In my mind (before I started) I imagined that I could simply wrap strips of fondant around the cake to give the impression of swords crisscrossing around the throne.
In actual fact, the swords are structured in a pattern where the top few rows of swords point upwards before the lower levels of swords change to be ‘handle up’. They also cascaded over each other, so the top layers had to go on first with the lower swords overlapping.
I used a hardening agent and florist wire to skewer the tallest swords into the top of the cake. Then came the tedious task of cutting, strip by strip, many little fondant swords to make up the rest of the pattern.

As you can see from my mid-photo progress shot, I didn’t bother with fondant over the whole cake because I knew I’d be airbrushing it and most of that detail would have been lost anyway.
I deliberately squished and stretched some of the lines of fondant, to give it that wobbly "just-smelted-in-to-a-chair" look.
Handle details were piped on with grey royal icing.
Step 3 - Airbrushing
The quickest part of the job and the bit that made the most dramatic change in the design was airbrushing.
I highly recommend our Spectrum Flow Airbrush & Compressor Kit for a whole range of reasons, but mostly because unlike previous brands it has a cap on the ink cup. I know this seems super obvious, but for years when I was using previous brands there was no lid, and I had to be overly careful not to drip food colouring over the edges of my cup!

My biggest tip is to spray all the gaps first with black to add depth and cover any of the chocolate segments. Then, a light dusting over the top with silver. I used Americolor AmeriMist in both cases, but Magic airbrush colours would also do the trick.
The result is a super shiny, 3D sword effect, that took about 5 minutes to achieve.

Step 4 - Board
In my opinion, the most underrated and forgotten part of the cake design is the cake board.
I considered a few options, including a black wrap of fondant or a woodgrain finish, but in keeping with the theme, I thought cobblestones would be best.
Also, as cobblestones aren’t symmetrical I was able to easily ‘squish’ them up against the base of the cake to give a seamless finish to the edges of the cake.
In this case, it was as simple as cutting various circles of fondant using a circle cutter set, applying them to the board any which way using sugar glue and then giving a simple wash of liquid black colouring mixed with rose spirit (to achieve a watercolour effect) across the ‘stones’.

And that was the process for completing our edible, chocolate mud cake version of the Iron Throne!
We'd love to know your thoughts on our creation, and if any of our tips were helpful to you! So leave a comment below.
~Sarah-Jane

Comments
1 Comments
-

Posted by Marie-Ann Coyle | August 27, 2019
Leave a CommentWell done on the Game of Thrones chair. I love all the new products which are coming in to add sculpture to our cakes.